Pre-Operation Checklist for Diesel Lawn Mowers
Proper operation of the engine, including thorough pre-starting checks, standardized starting procedures, and correct shutdown steps, is crucial to ensuring the safe and efficient operation of the machinery, extending its service life, and preventing mechanical failures or safety accidents. The detailed operation guidelines are as follows:
1. Pre-starting Checks
Pre-starting checks are the foundation of safe engine operation, as they can effectively identify potential faults and hidden dangers in advance, avoiding mechanical damage or safety accidents caused by insufficient preparation. All checks must be carried out carefully and comprehensively, and any problems found must be resolved immediately before proceeding to the next step.
(1) Fuel and Lubricant Level Check
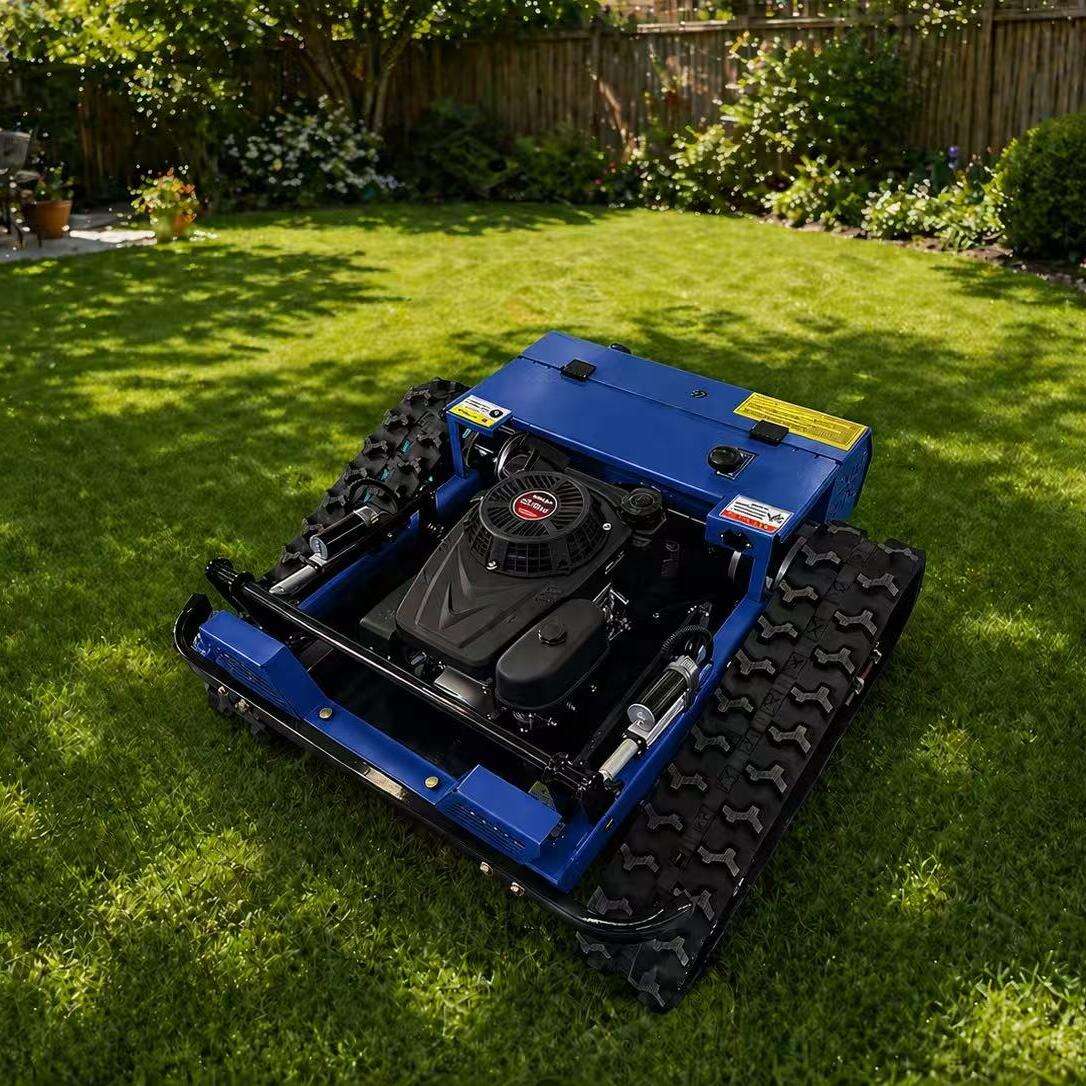
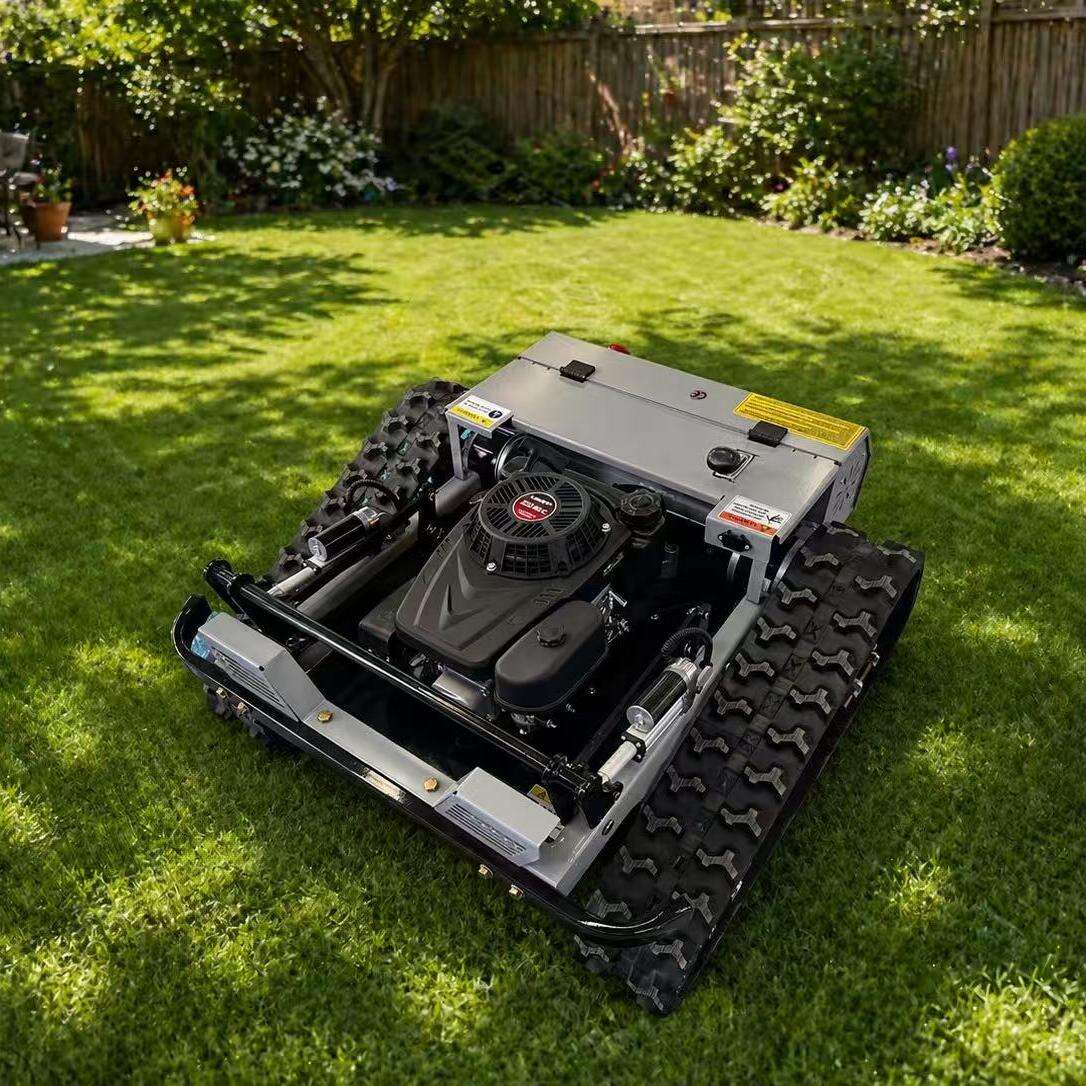
Prior to ignition, it is essential to verify the engine fuel and lubricant levels to ensure the engine can operate normally without insufficient fuel or lubrication. First, check the diesel fuel level: open the fuel tank cap and observe the fuel gauge or dipstick to confirm that the fuel volume meets the operating requirements. Select the appropriate-grade diesel fuel based on the current ambient temperature conditions—for example, use low-freezing-point diesel in cold environments to prevent fuel solidification, which may block the fuel pipeline and cause the engine to fail to start. Next, check the engine oil level: pull out the oil dipstick, wipe it clean, insert it back into the oil tank completely, and then pull it out again to observe the oil level. Ensure the engine oil reaches the designated fill level (between the upper and lower scale lines of the dipstick). If the fuel or oil level is insufficient, address the deficiency immediately by adding the corresponding fuel or oil of the specified grade. Failure to do so may lead to insufficient lubrication of engine components, increased friction, and severe mechanical damage such as cylinder scuffing or bearing wear.
(2) Battery Charge Status Inspection
The battery is the power source for the engine’s electrical system, and its charge status directly affects the engine’s starting performance. Use the battery’s built-in indicator or a professional voltmeter to inspect the charge status. If the indicator shows insufficient charge (e.g., the green light is off or the red light is on) or the voltmeter reading is below the recommended threshold (usually 12.6V for a 12V battery), the battery must be fully recharged before operation. A low-charge battery may cause the engine to fail to start, or the electrical system to work abnormally, affecting the normal operation of components such as the ignition system and remote control.
(3) Bystander Safety Warning
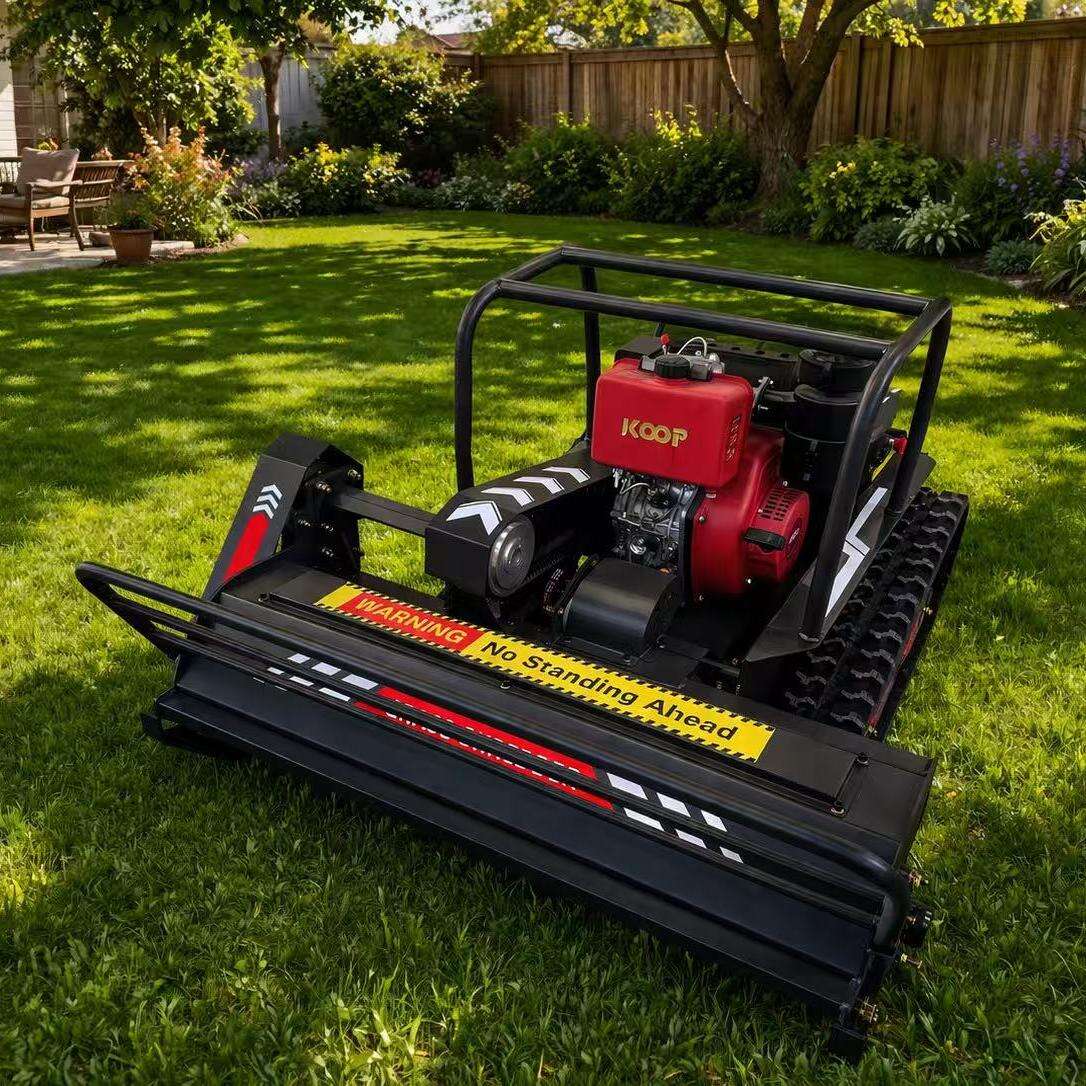
During engine operation, the rotating components (such as the cutting blade) and the exhaust gas of the engine pose potential safety hazards to bystanders. Before starting the engine, issue clear verbal warnings to all bystanders nearby, clearly informing them of the upcoming start of the machinery and requiring them to maintain a minimum safe distance of 10 meters from the operating machinery. It is necessary to ensure that all bystanders have heard and understood the warning and have moved to a safe area to prevent accidental injury caused by being too close to the rotating parts or being hit by flying debris.
(4) Working Terrain Assessment
The working terrain has a significant impact on the safety and stability of the machinery. Conduct a thorough assessment of the entire working area before operation. First, remove all obstacles on the terrain, including stones, tree stumps, metal debris, and other foreign objects, to prevent these objects from being hit by the cutting blade during operation, which may cause blade damage, blade deformation, or even mechanical failure. When working near ditches, slopes, obstacles, or uneven ground, exercise extreme caution: avoid operating on slopes that exceed the machinery’s rated slope to prevent rollover; keep a safe distance from ditches and obstacles to avoid collision or falling into the ditch. For particularly hazardous areas that cannot be avoided, bypass them entirely to ensure the safety of the operator and the machinery.
(5) Mechanical Connections Inspection
All mechanical connections, fasteners, and mounting bolts of the machinery may loosen due to long-term operation or vibration. Before starting the engine, carefully examine each connection part, including the connection of the engine, cutting mechanism, frame, and other components. Check whether the bolts, nuts, and other fasteners are loose, missing, or damaged. If any loose components are found, tighten them with the appropriate tools immediately; if any hardware is missing or damaged, replace it with parts of the same specification before operation. Loose or missing fasteners may cause the machinery to vibrate excessively during operation, damage components, or even lead to the separation of parts, resulting in serious accidents.
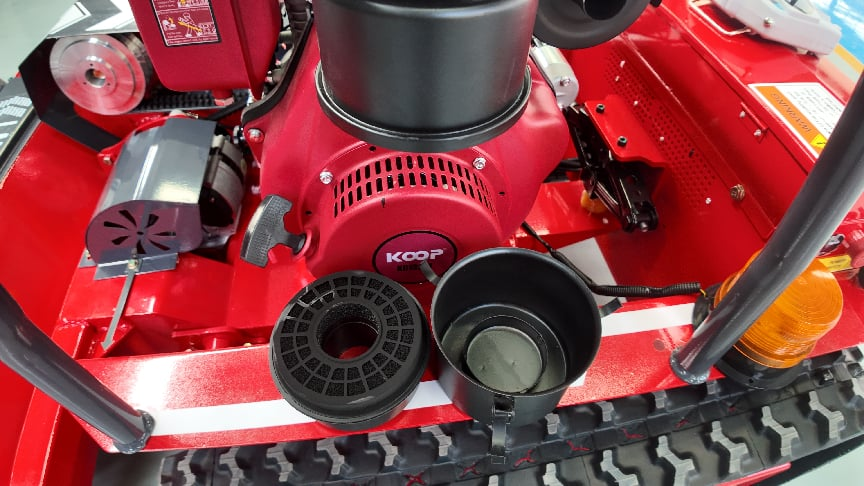
(6) Air Filter Assembly Treatment (For Initial Operation)
For the initial operation of the engine, the air filter assembly needs to be saturated with engine oil to enhance its filtering effect and protect the engine from dust and impurities. First, remove the oil bowl of the air filter, then pour engine oil into the oil bowl until it reaches one-third of the capacity of the concave bottom section. After filling, reinstall the oil bowl and ensure that the filter element inside the air filter achieves complete saturation with the oil. This step can effectively filter out dust and debris in the air, prevent them from entering the engine cylinder, and avoid wear of the cylinder, piston, and other key components.

2. Engine Starting Procedurev
The engine starting procedure must be followed in strict accordance with the specified steps to ensure successful ignition and avoid damage to the engine or electrical system. Each step must be carried out in order, and the operation must be standardized.
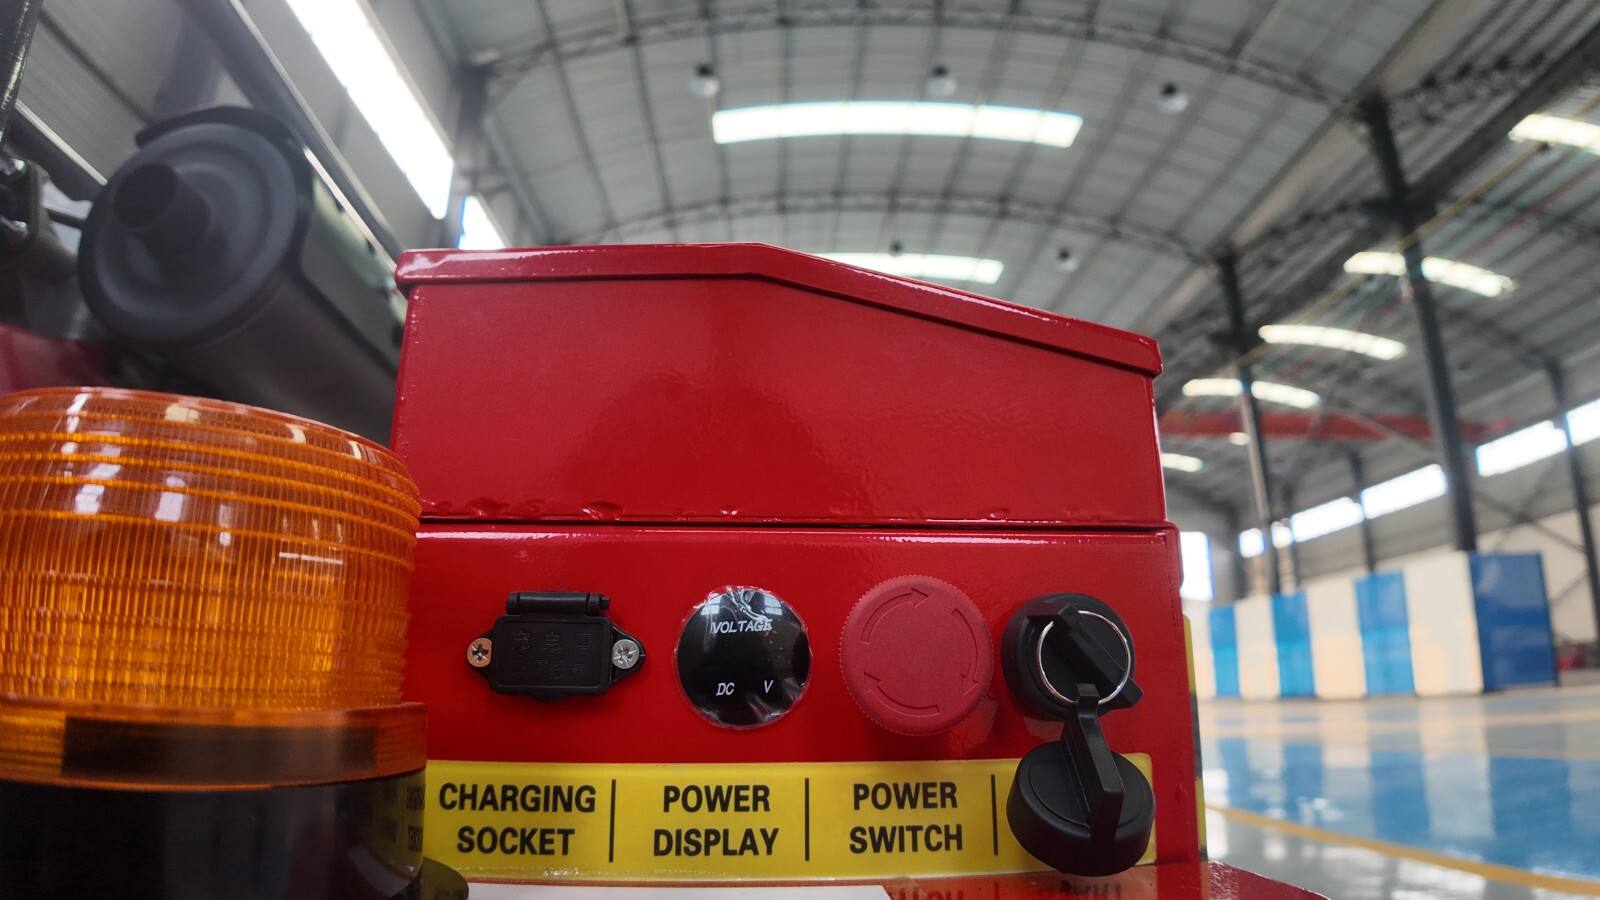
(1) Activate the Main Electrical System
Locate the power switch of the machinery, which is usually installed in a prominent position on the control panel or the engine body. Rotate the power switch clockwise to the "ON" position to activate the main electrical system of the engine. At this time, the indicator lights on the control panel should be on, indicating that the electrical system is working normally.
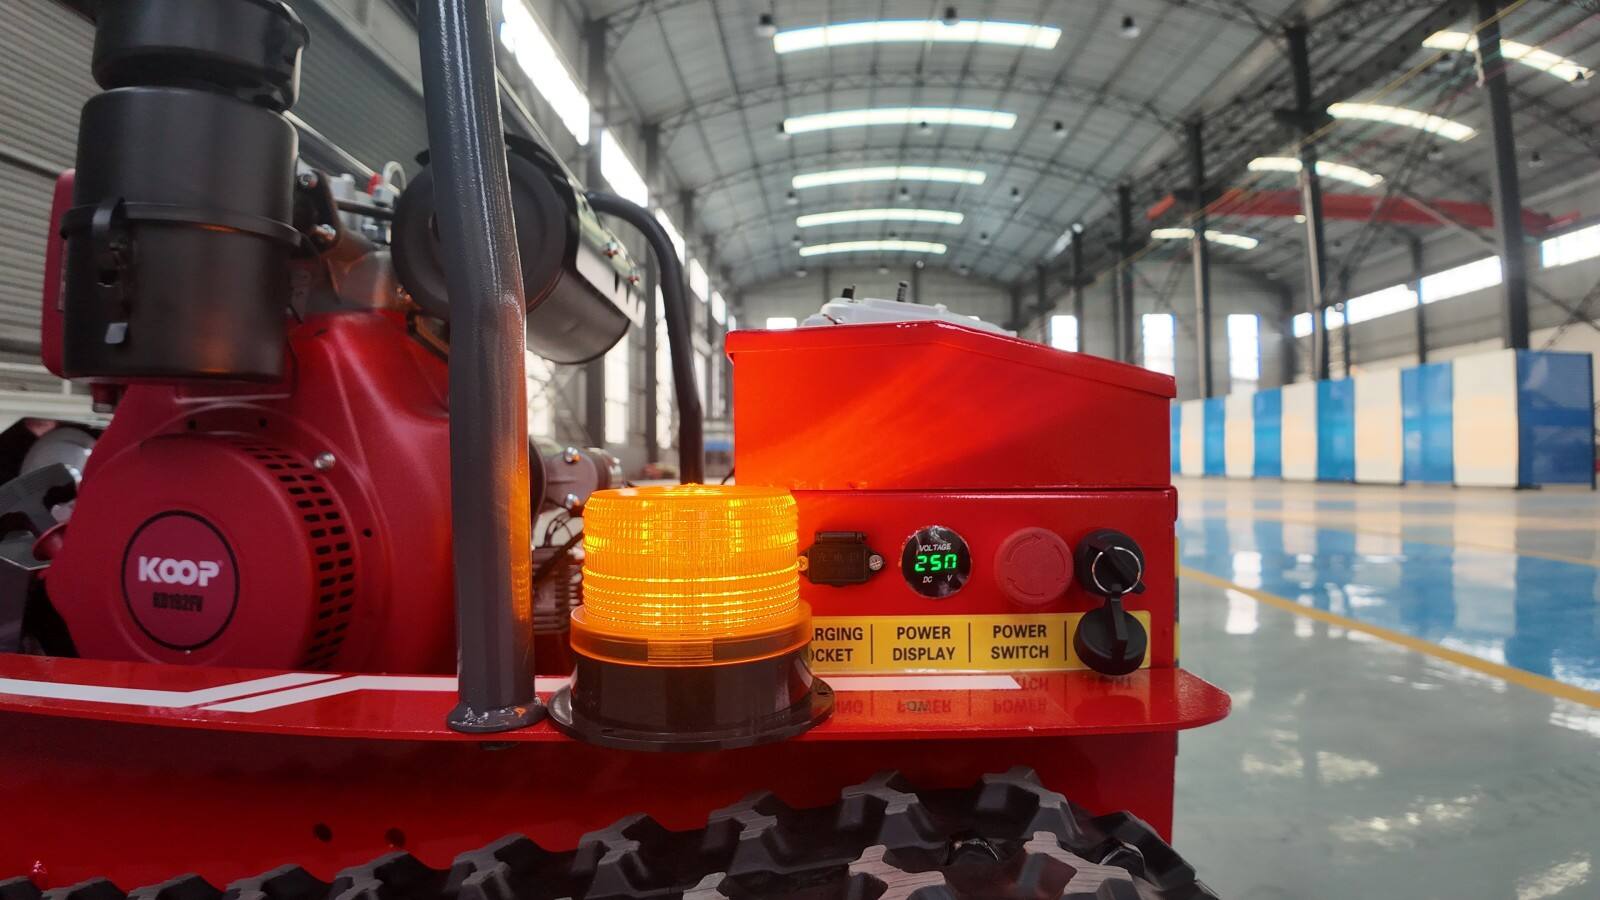
(2) Establish Remote Control Connection
If the machinery is equipped with a remote control, press and hold the power button on the remote control for two seconds to establish a connection between the remote control and the machinery’s control unit. After successful pairing, the indicator light on the remote control will turn green (or show a specified color), and the directional controls and other functional buttons on the remote control will become operational. If the pairing fails, check the remote control battery and the connection signal, and try pairing again until it is successful.

(3) Adjust the Throttle Position
Locate the throttle control lever or knob, and adjust it to the fifty percent open position. This position can provide sufficient fuel supply for the engine during startup, ensuring smooth ignition without excessive fuel consumption or insufficient power. Do not adjust the throttle to the maximum or minimum position during startup, as this may affect the startup effect.
(4) Ignite the Engine
Engage the decompression button (if equipped) with one hand, and simultaneously rotate the ignition key clockwise to the "START" position with the other hand. Maintain this state for two to three seconds to allow the engine to preheat and build up sufficient pressure, then release both the decompression button and the ignition key. At this point, the engine should achieve normal ignition, and you can hear a stable running sound. If the engine fails to start, wait for 30 seconds to 1 minute before trying again to avoid damaging the starter motor.


(5) Complete the Startup Sequence
After the engine starts normally, slowly advance the throttle to the specified operating speed (usually the middle-high speed position suitable for mowing operations). Then, according to the diagram marked on the machinery, move the clutch lever to the engaged position to activate the cutting mechanism. At this point, the startup sequence is complete, and the mowing operations can be carried out normally. During the initial operation, observe the engine’s running status, including the sound, vibration, and indicator lights, to ensure everything is normal.
3. Engine Shutdown Procedure
Correct engine shutdown procedures can protect the engine and extend its service life, avoiding damage caused by improper shutdown. When reaching the destination or needing to pause the operation, follow the following steps to shut down the engine in order:
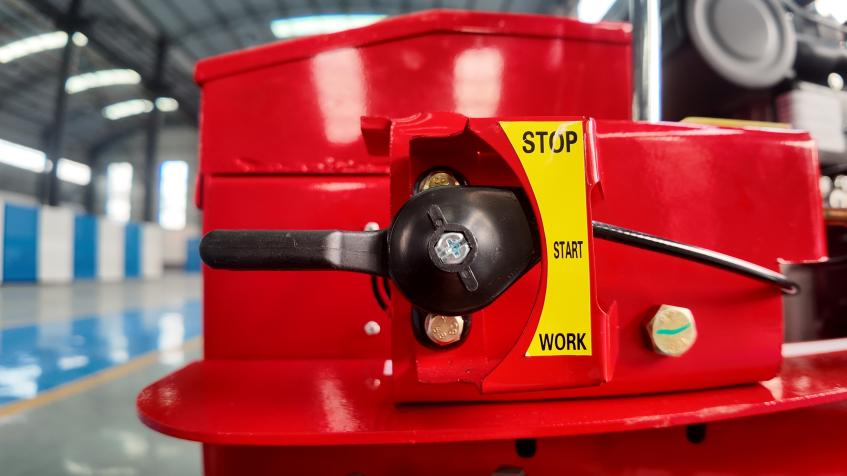
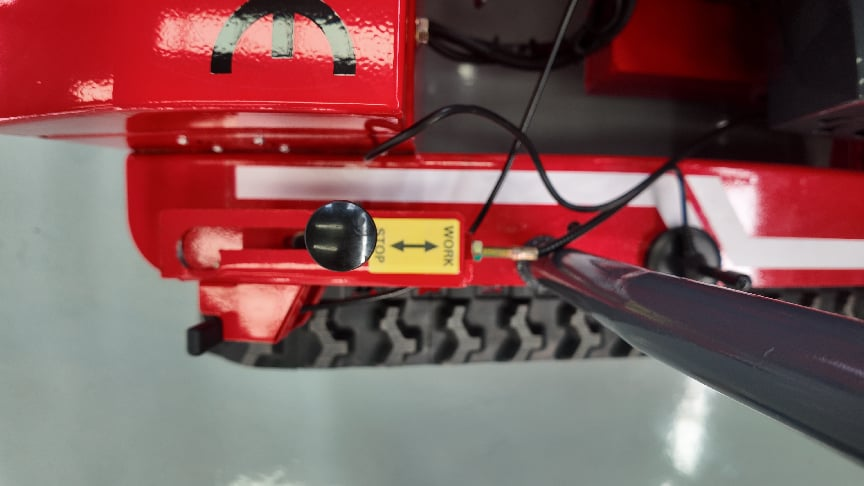
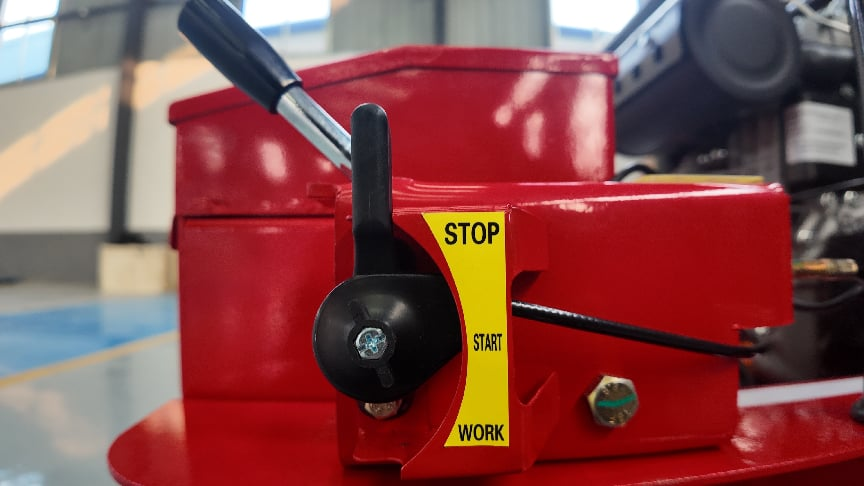
First, according to the illustration on the machinery, disengage the clutch push rod to the stop position. This action will cut off the power transmission to the cutting mechanism, halting the rotation of the blade to ensure safety during shutdown.
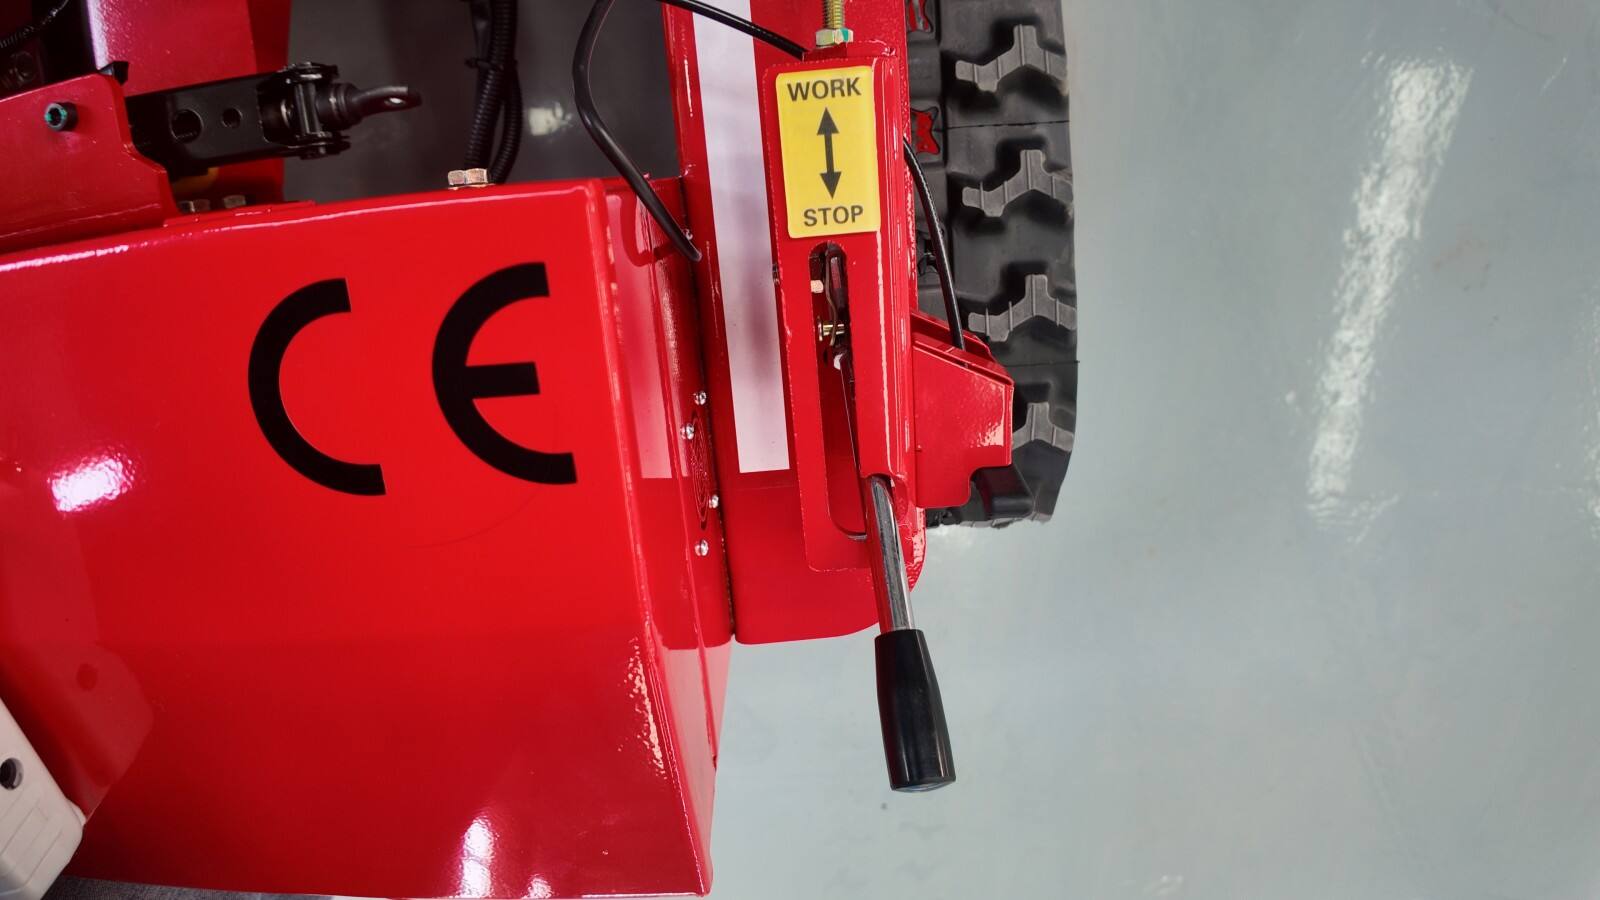
Next, reduce the throttle to the minimum idle position and keep it in this state until the engine gradually ceases operation. Do not turn off the engine immediately after high-speed operation, as this may cause the engine to overheat or damage the components due to sudden cooling. After the engine stops running, rotate the power switch counterclockwise to the "OFF" position and press it to disconnect the main power of the electrical system.
Finally, activate the power switch on the remote control to terminate the operation of the control unit, ensuring that the entire machinery is in a power-off state. After shutdown, it is recommended to conduct a brief inspection of the engine, such as checking for oil leaks or abnormal sounds, to prepare for the next operation.

 Hot News
Backed by more than 10 years of professional manufacturing experience, we continuously provide global customers with highly reliable, efficient and multi-functional overall solutions for construction machinery.
Wangyin Police Station, Huangwang Road, Yanzhou District, Jining City, Shandong Province, 88 meters east of the road, north side
Copyright © 2026 Shandong Guchi Machinery Manufacturing Co., Ltd. All rights reserved. Privacy Policy